
As music producers, we strive to create a full, wide mix. It’s undisputed: mixes that utilize the full stereo spectrum to achieve perceived width sound better to the listener. Luckily for us, there is an array of tools and techniques available to us designed to widen our mix and achieve a more professional sound.
We are going to be discussing the following six techniques to achieve a wide, full mix:
The Haas effect is an acoustic phenomenon discovered by Dr. Helmut Haas in 1949. Haas discovered that when one sound is followed by another with a delay time of approximately 20 to 40 milliseconds, the two are perceived as a single sound. This is how it’s achieved in music production:
You can create and save an Ableton rack like I did here to streamline the process.

Tonal micro shifting is very straightforward – the basic idea is that you pan one signal hard right, one hard left, and then slightly change the tone of one of the tracks in order to achieve stereo width. These are the steps:
Using Split EQ is very similar to the tonal micro shifting method. The only difference is that EQ settings are used to created slight differences in each side rather than slight detuning. The steps are as follows:
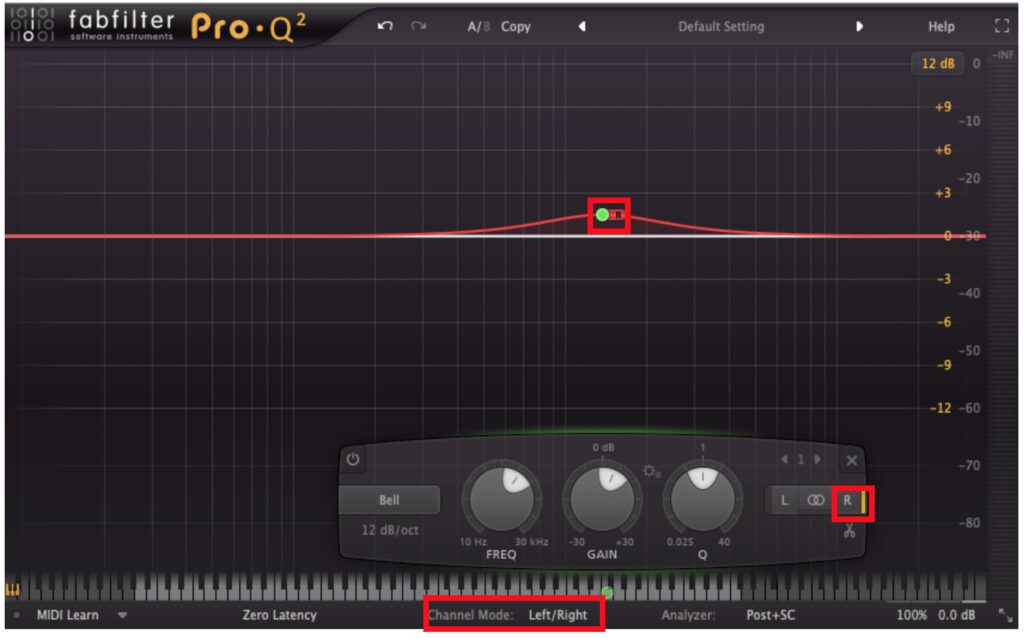
Alternatively, some EQ plugins have an option to apply EQ to only 1 side of the mix. Here’s how to do it in FabFilter Pro Q-2:

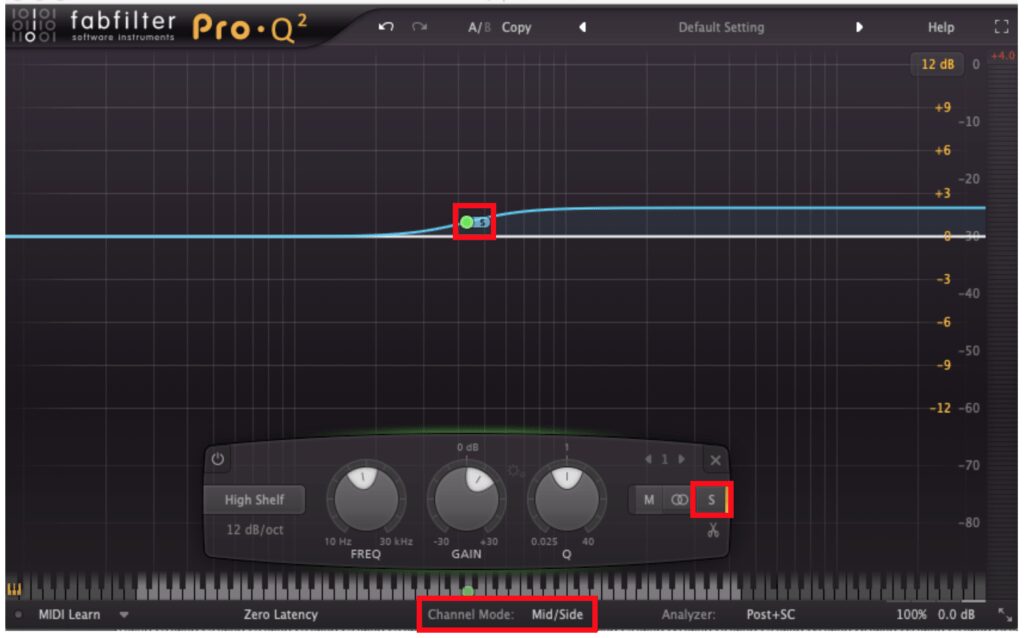
Mid/Side EQ splits the audio signal into two bands and allows you to make EQ moves to one band or the other.
Therefore, if you want to add width to your track, you can engage “side” EQ and boost only the sides to increase stereo information – thus making your track sound wider. Here’s how to do it in Pro Q-2:

Doubling is a very common practice when recording live instruments or vocals. It’s very straightforward:
Since it’s humanly impossible to sing or play two takes the exact same way, the audio for each take will be slightly different. Thus, when it’s panned hard right and left the resulting effect sounds extremely wide to the listener.
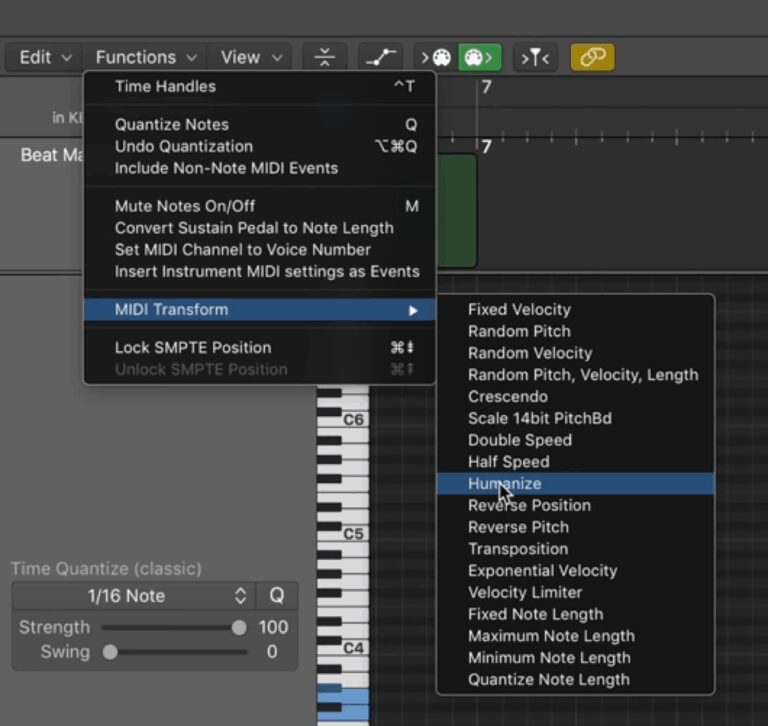
However, computers are able to perfectly replicate takes. Thus, we have to manually go in and make small changes to the “performance” in order to achieve the doubling technique. These are the steps:
Utilizing the “humanize” feature in Logic:

While there are several plugins solely dedicated to widening elements in the mix, my favorite by far is Wider by Infected Mushroom. This plugin is amazing for two reasons:
There’s no reason not to get this plugin – you can download a free copy here.

You now have all of the tools necessary to create wide, full, wall-of-sound type mixes. Just watch out: it’s definitely possible to overdo it and hurt your mix.